
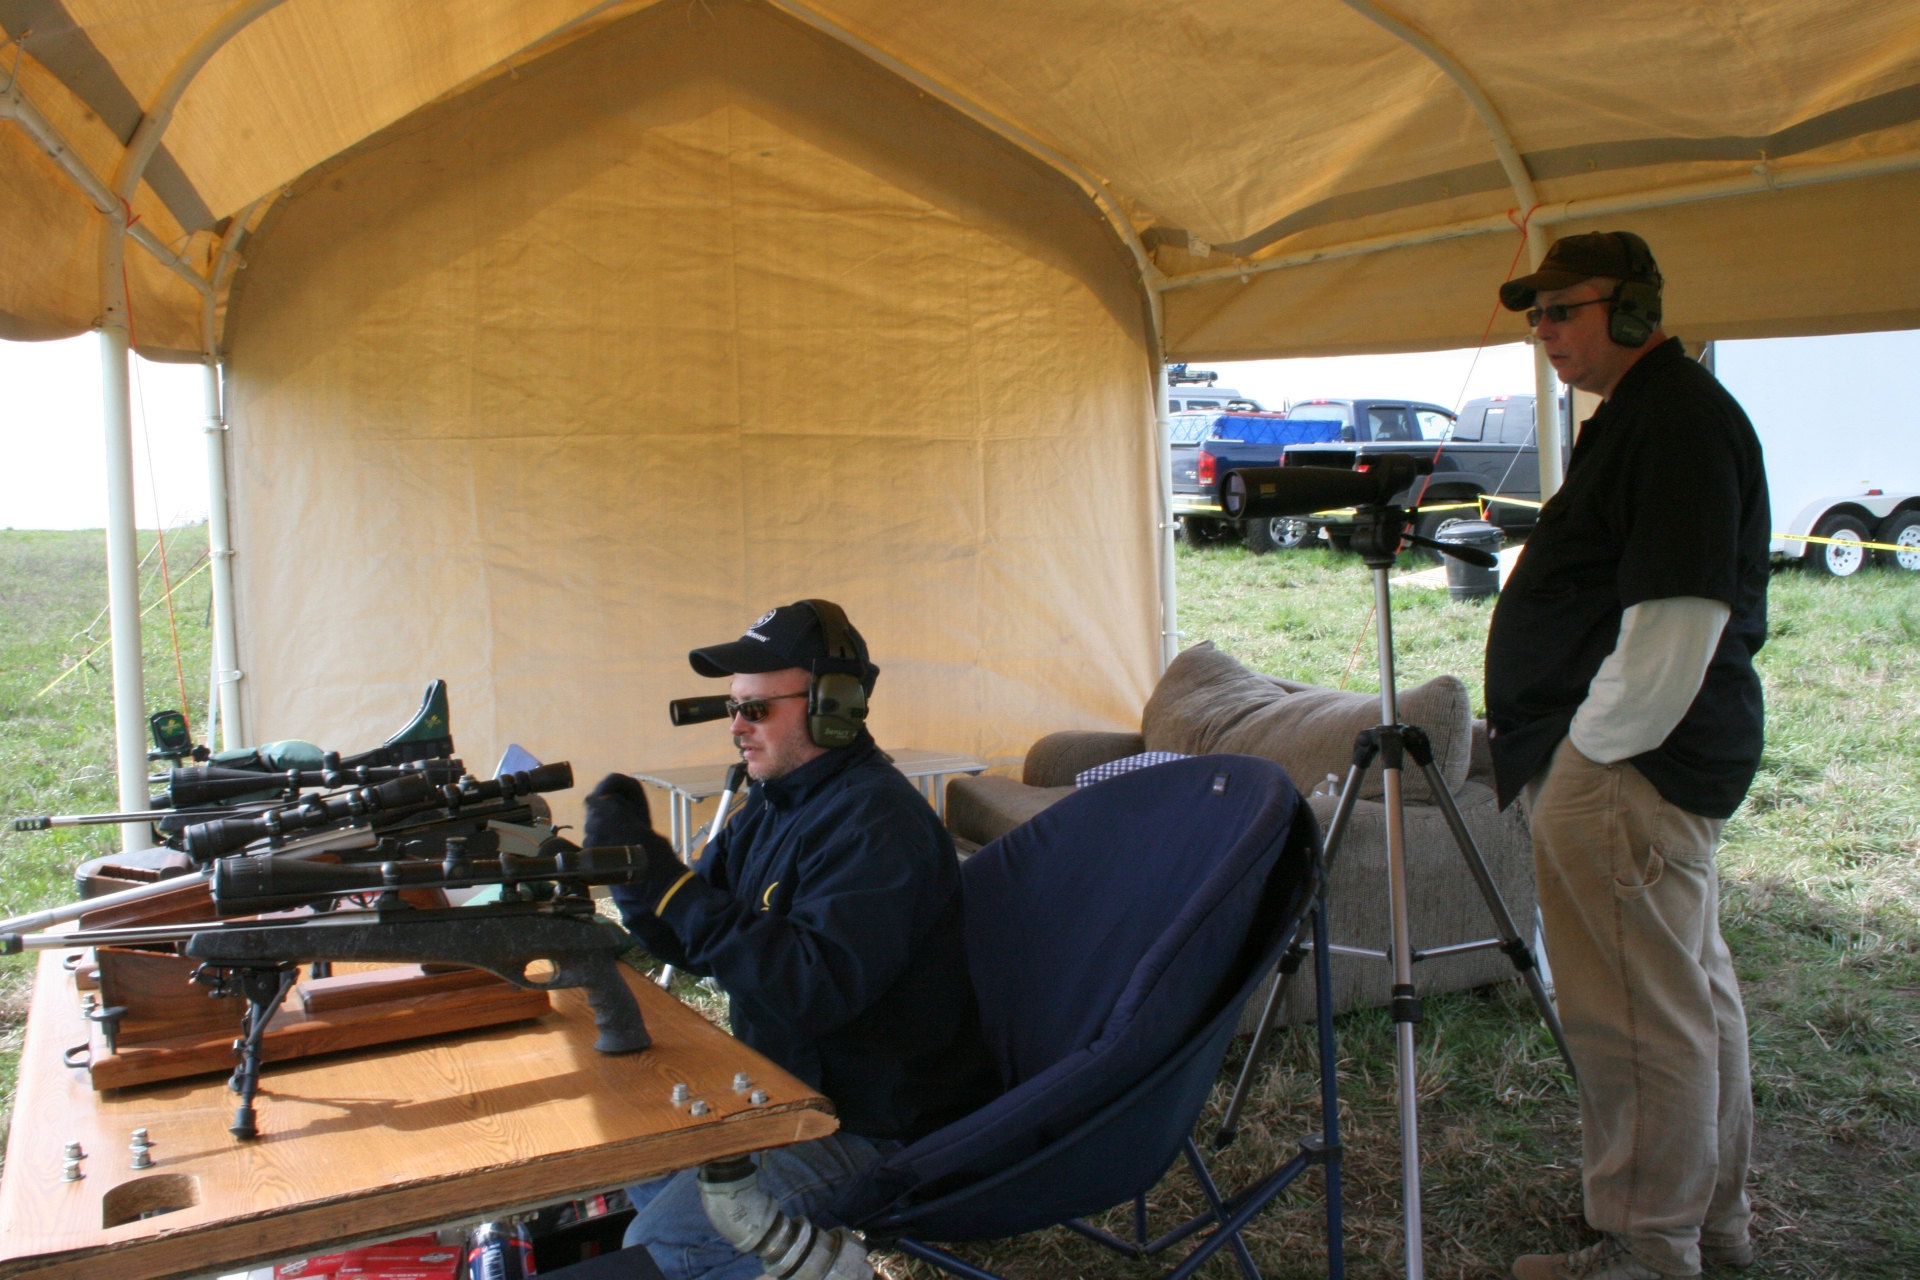
Hello. I’m Dave and I’ve attended Boomershoot along with Phil and David for a few years now. We share several shooting positions under the canopy affectionately called the Boomeragio.
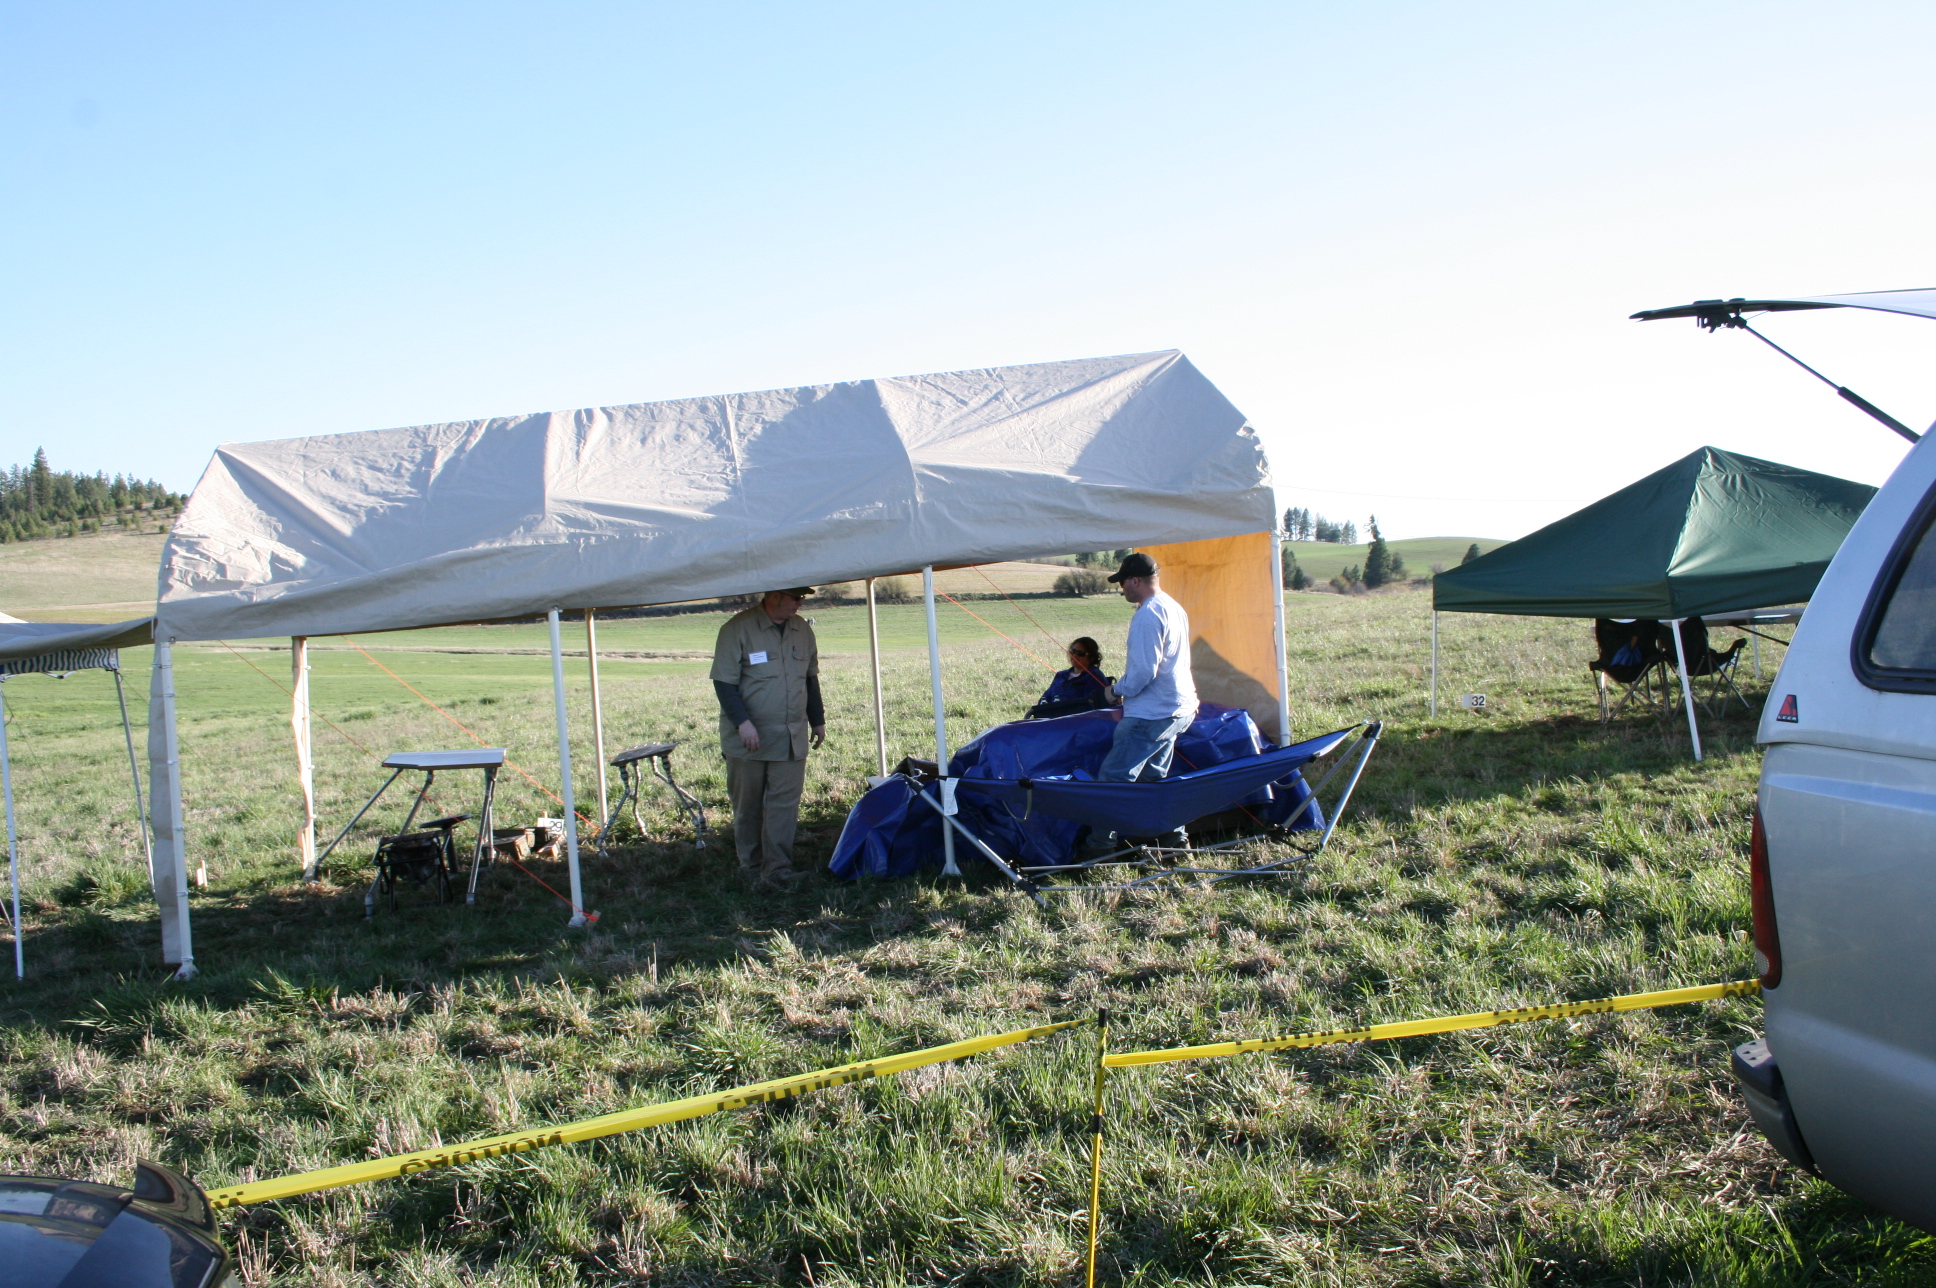
Who else but Phil would think of having a couch at the firing line?
It has become an annual pilgrimage for me to load up the truck and head out to Idaho to hunt Boomers with Phil and David (and eat at the local Mexican restaurant). I’m not a pro picture shooter by any stretch of the imagination. I usually put the old camera on full auto and point and shoot. Sometimes I get lucky and the camera grabs something that some folks appreciate. David and Joe seemed to like this one.
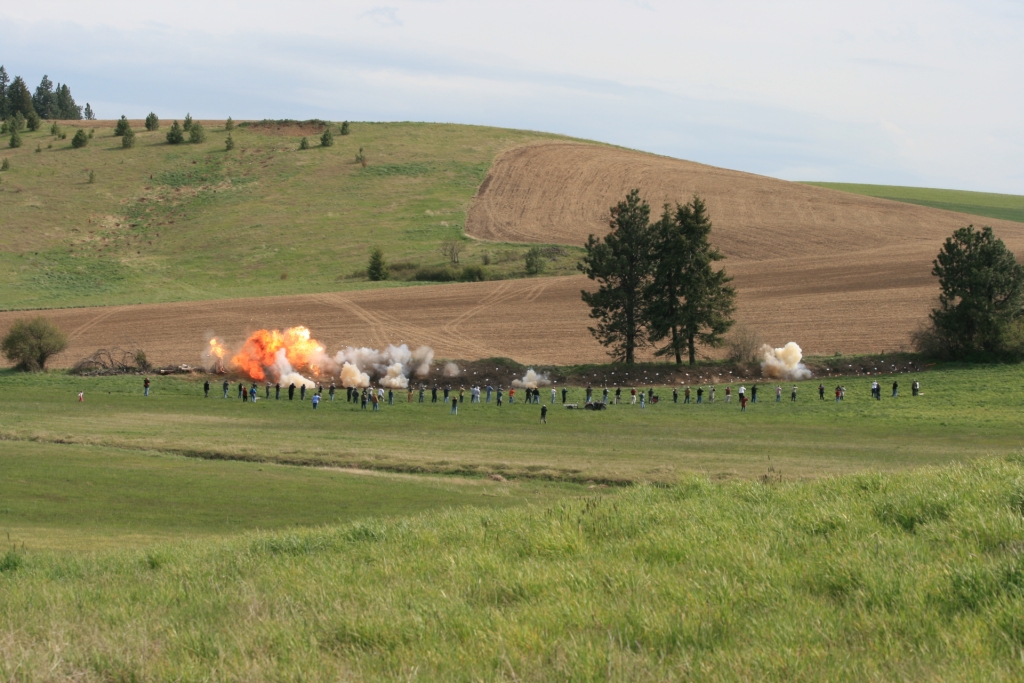
It was taken in 2007 at the Boomershoot “clean-up†activity, now known as the “High Intensity†event. There are a bazillion good photographers out there on the intarweb and I won’t be trying to outdo National Geographic or anything like that. I’ll just run some photo essays from time to time dealing mostly with firearms and such.
So, without further ado, let’s git ‘r done.
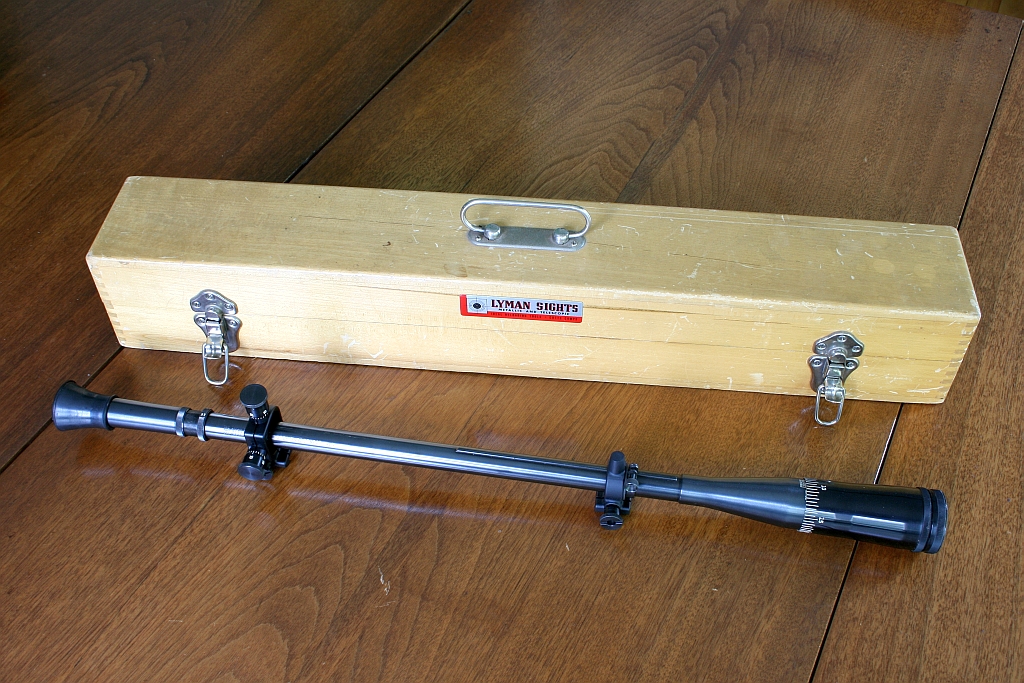
Swapping External Mounts on a Lyman TargetSpot Scope
While at one of my BPCRS matches I had overheard some fellow shooters talking about some new external Unertl-type mounts that one of them was using on his single shot rifle. (BPCRS = Black Powder Cartridge Rifle Silhouette. Matches are shot with the old single shot buffalo rifles from the late 1800’s, such as Sharps, Remington, Winchester, Ballard and others. To see an example of a Sharps, go rent ‘Quigley Down Under’ if you’ve not seen it. )
The mounts were made by an outfit in Oklahoma by the name of D.Z. Arms. I was intrigued enough to contact them and order a set to use with a Lyman TargetSpot scope.
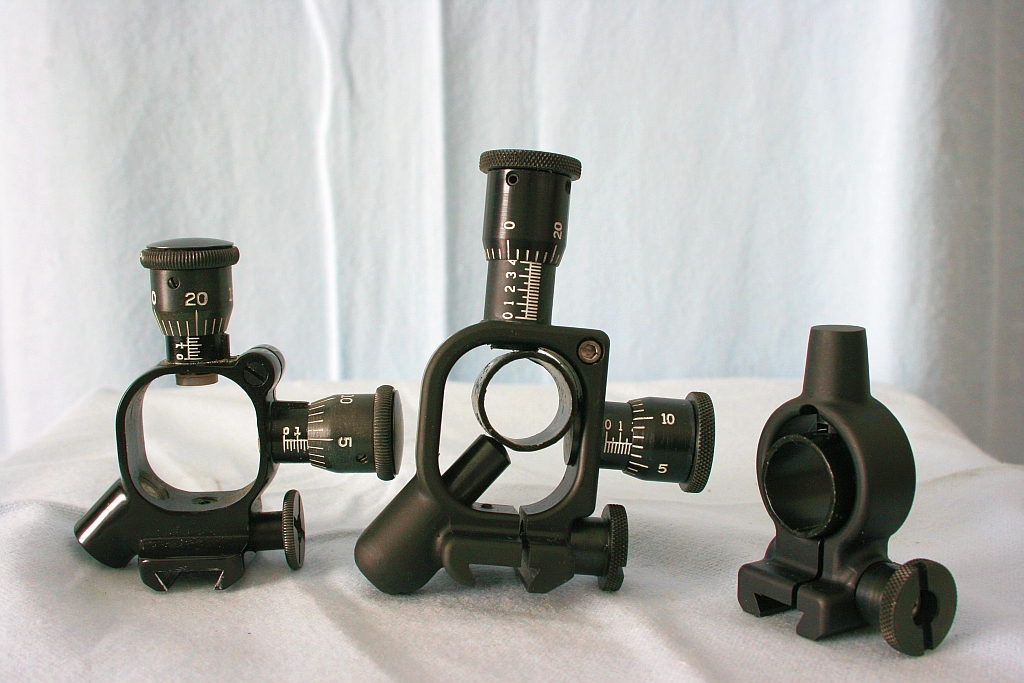
This next view shows the DZ mounts along with the Lyman rear mount. The DZ rear mount (center) is taller and has more vertical adjustment than the Lyman (left). The short tube sections in the DZ mounts are just dummy tubes to keep the plungers contained. Caution: you may have to make a change in the height of the mounting blocks as the increased adjustment won’t help much if you point the end of the scope into the barrel near the muzzle.
In order to remove the Lyman mounts, some disassembly is necessary. I had never attempted this before and I don’t know if I performed the task as well as the experts at Parsons Scope Service would, but it seems to have turned out alright.
DISCLAIMER: If you decide to try and do this and you mess it up, you’re on your own. This little essay is just to show you all what I did and is not offered up as a shop manual.
We’ll continue below the fold……
Getting down to business, the first step is to remove the rubber eyecup. It is a slip fit, so can be easily removed.
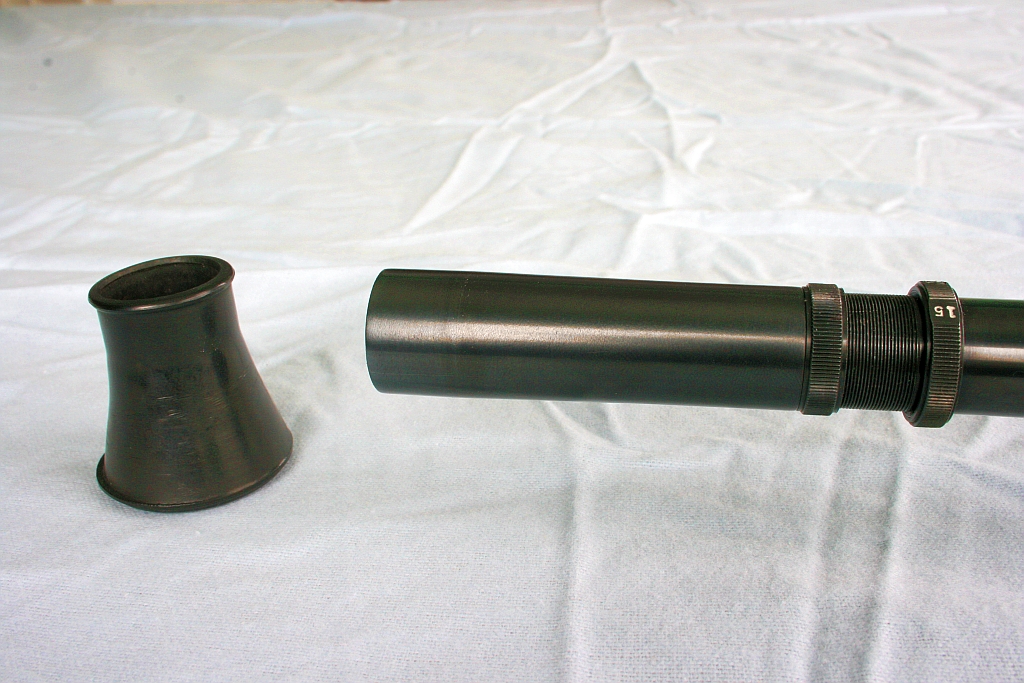
Then unscrew the eyepiece from the body.
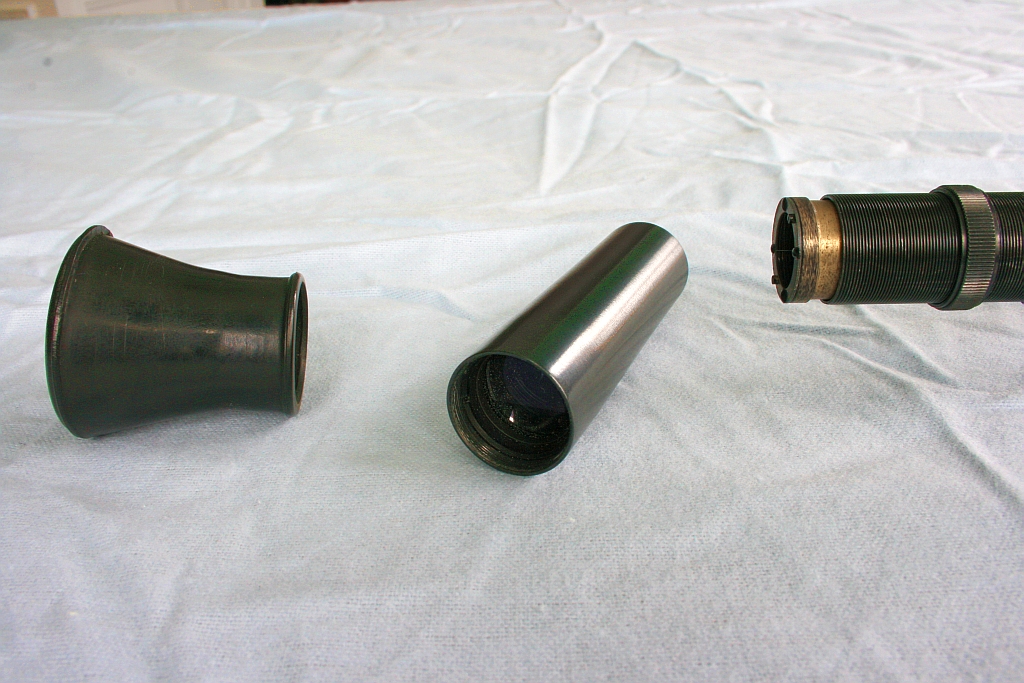
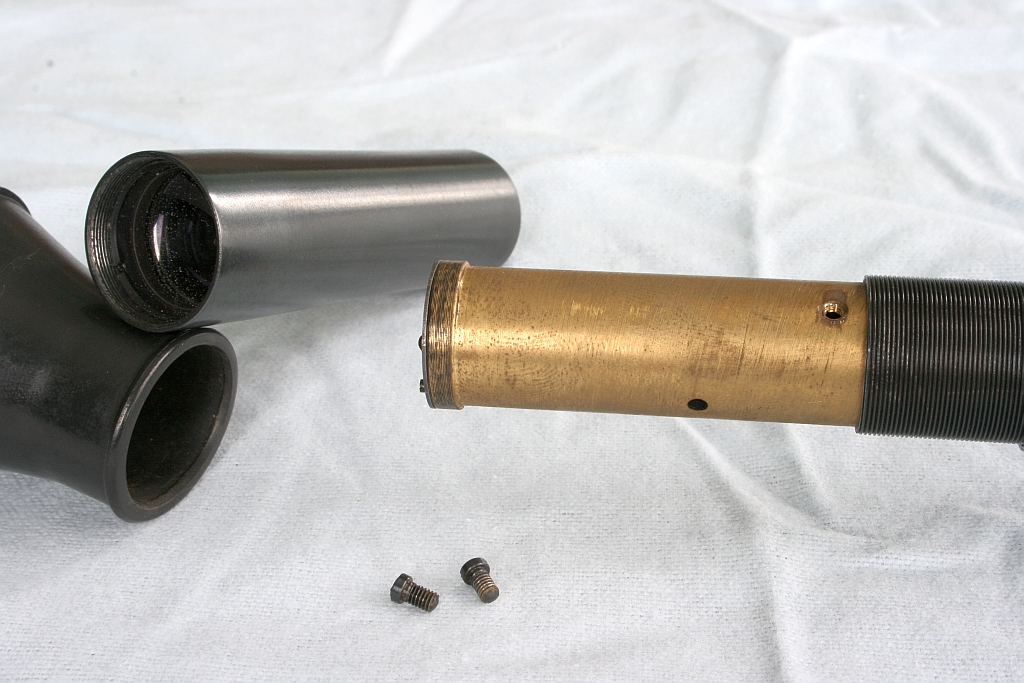
Unscrew the nut without the slotted screw (left in the picture) from the body. This nut locks the eyepiece in place after you’ve set your individual focus of the reticle.
You’ll notice the brass looking sleeve inside the scope body. This holds the fine crosshairs that make up the reticle.
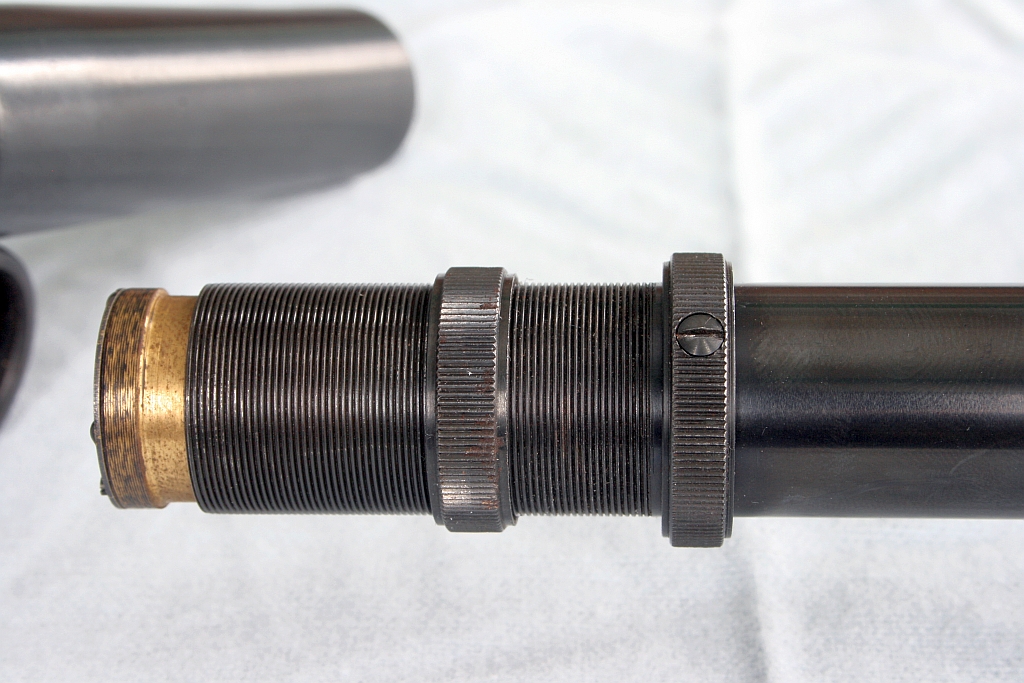
The nut on the right in the picture secures the reticle sleeve in the body. To remove the reticle sleeve, the slotted screw in the nut is removed and the sleeve can be GENTLY pulled from the body.
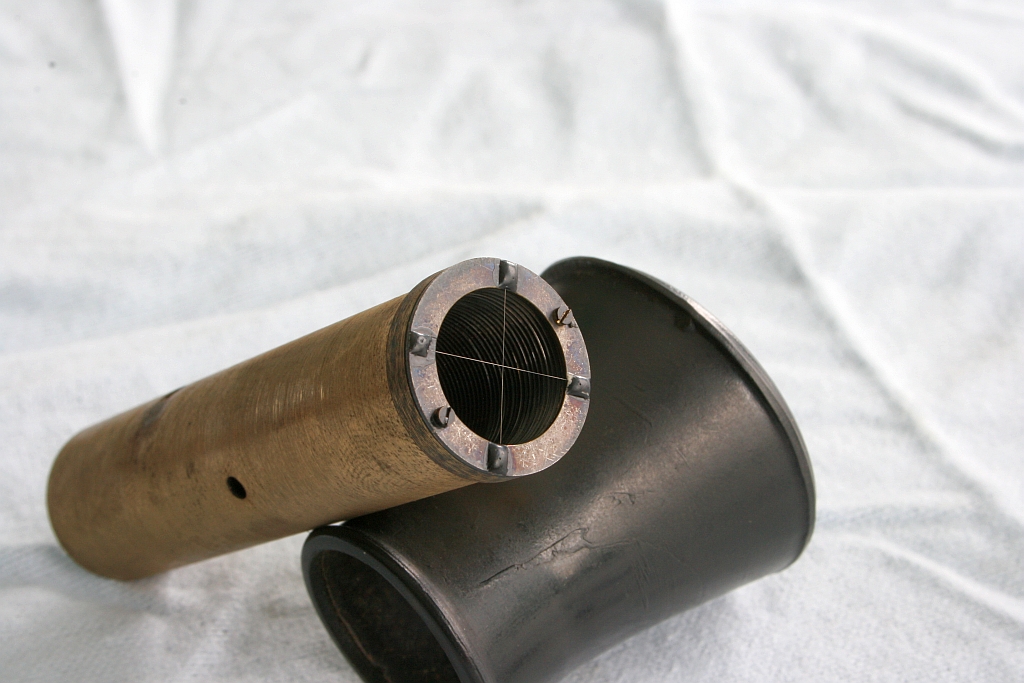
It may be tempting to reach out and touch the crosshairs because they are so fine, but if you succumb to the temptation, it is almost a certainty that you will be sending your scope to Parsons. By the way, they have a lot of business (maybe a lot of folks like to fondle reticles) and a substantial waiting period measured in months. DO NOT TOUCH THE CROSSHAIRS!!
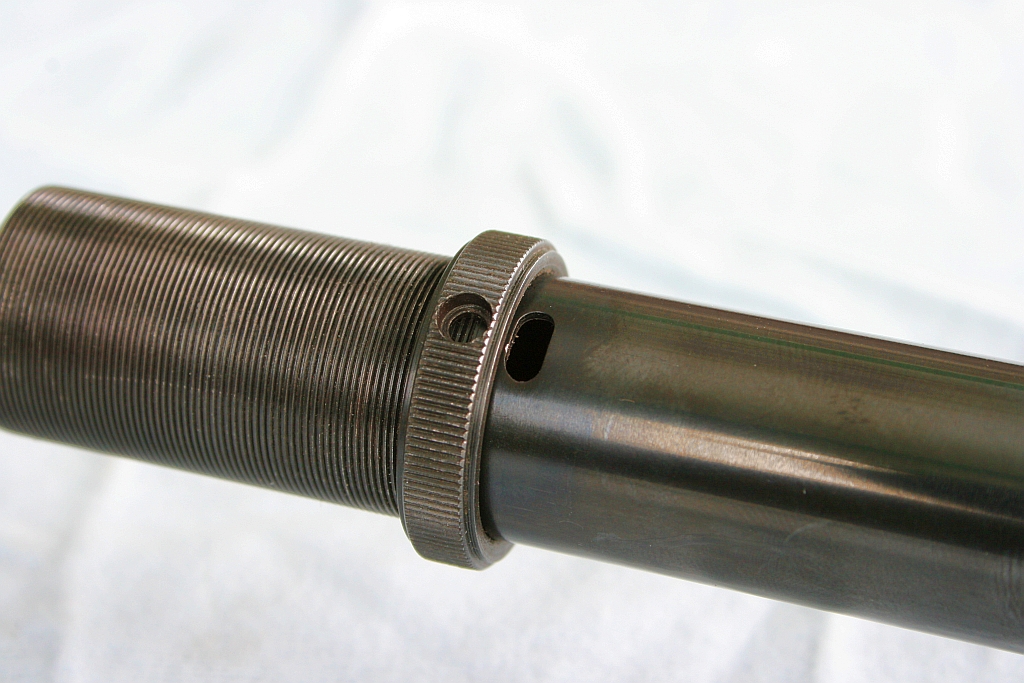
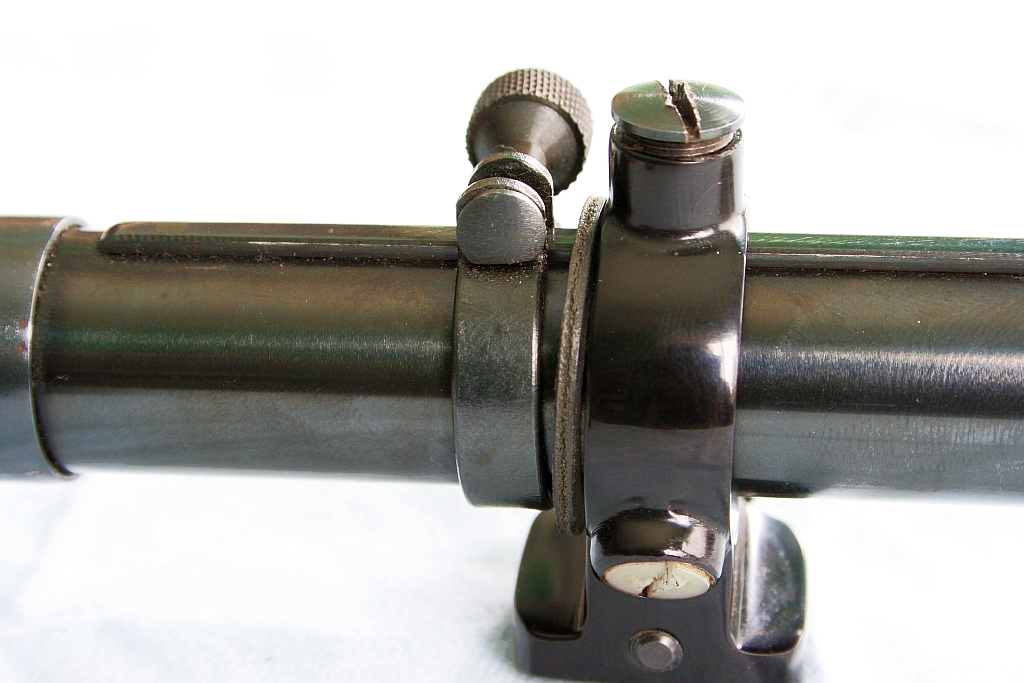
Next unscrew the nut a bit (to the left in the pic). Notice the oblong slot in the scope body where the screw passes through the body and into the sleeve. When the screw is slightly loose, this allows for a small amount of movement to align the crosshairs when the scope is reassembled.
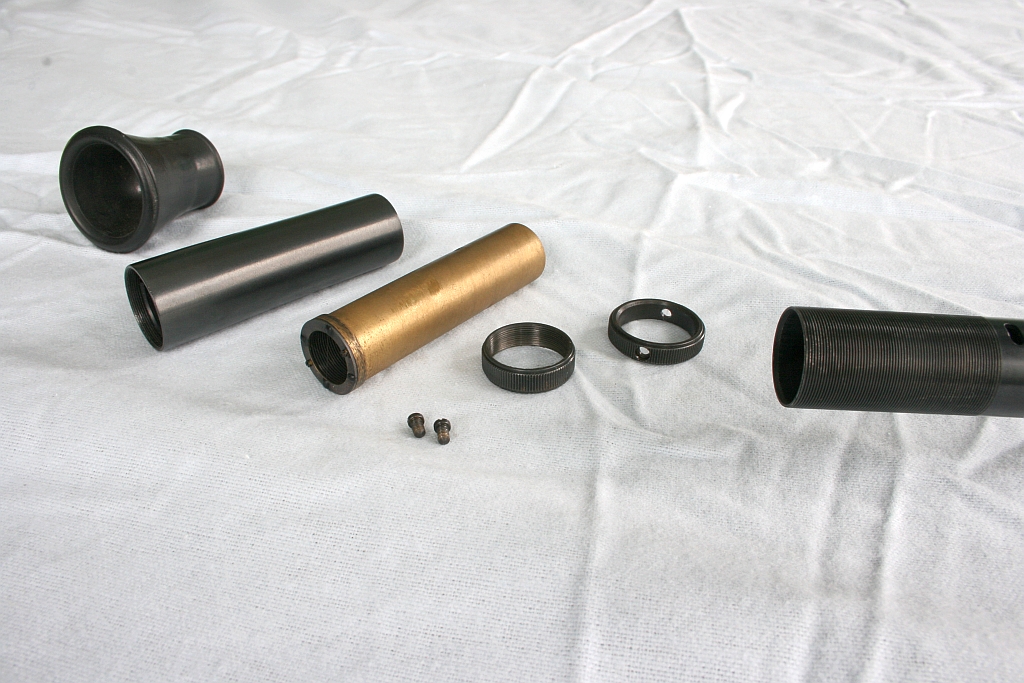
Finish removing the nut from the body and the scope is ready to remove the old mounts. All internal parts to be removed from the scope have now been removed and you can now proceed to removing the mounts.
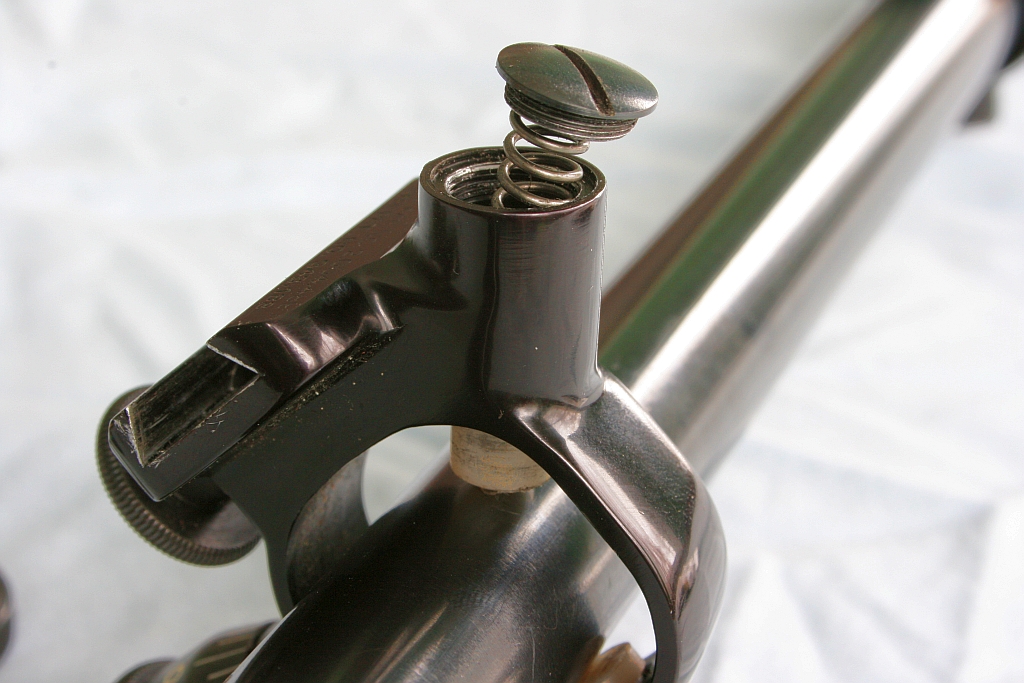
To remove the rear mount, first unscrew the slotted cap holding the spring and plunger on the bottom of the mount. This is the contact bushing which doesn’t have an adjustment micrometer on it.
With the tension on this contact point removed and the micrometers adjusted out to minimize the tension on their respective bushings, I was able to slide the mount off of the body. Moving it across the eyepiece threads was sort of washboard roadlike, but it came off.
The same procedure is done for the front mount. Loosen the slotted cap screw on the mount top and remove the spring and slotted plunger.
The slot in the plunger captures the external rail on the top of the scope body and maintains proper alignment when the scope moves forward on the rifle during recoil.
Now the DZ Arms mounts are installed, first the front and then the rear. The reticle sleeve and eyepiece components are reassembled to the body in the reverse order of the disassembly. NOTE: The DZ Arms mounts do not have removable cap screws holding the springs and plungers as did the Lyman mounts. I used a small flat screwdriver to depress the plungers as I slid the mounts onto the body. There may be other methods that work, but that’s what came into my mind when the task was at hand.
This pic shows the scope with the new mounts. (those OCD types will notice that the pic is the same one used at the top of the post. Caught me! The first pic is an after, not a before).
And this next pic shows the scope mounted on my Winchester Hi-wall in 25-35 Ackley Improved.
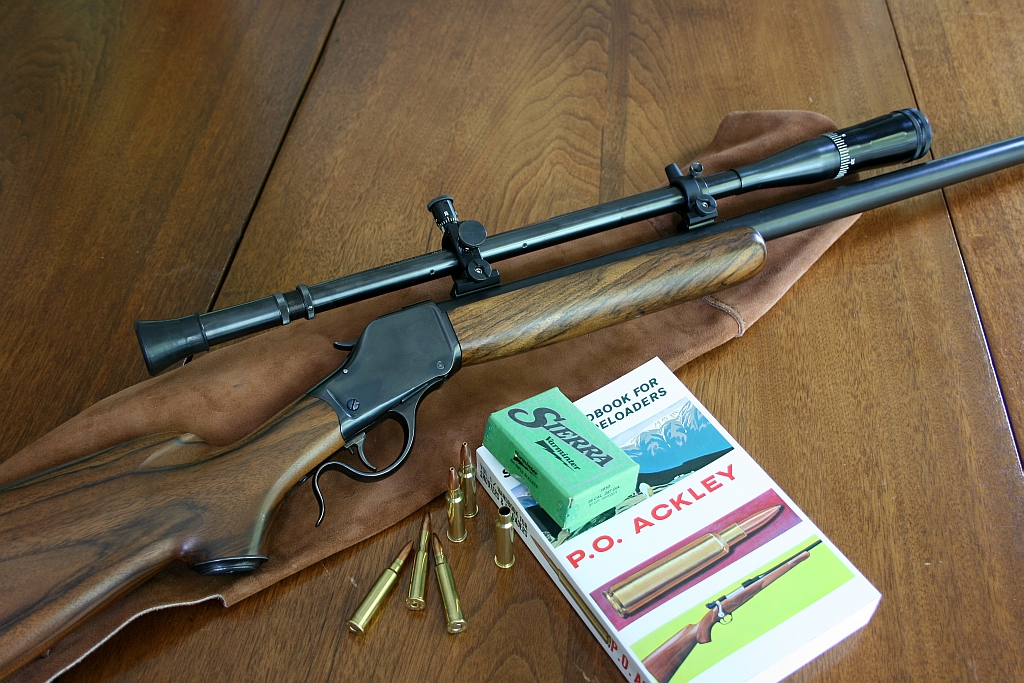
Who knows, this rifle may be a candidate for a future post.
Later.
D.